
Embark on a journey curated by seasoned explorers William and Hui Cha Stanek, who have spent decades immersing themselves in the diverse landscapes of North America. These itineraries are more than just travel plans - they are thoughtfully crafted adventures designed to help you connect with the natural world, discover hidden gems, and create lasting memories.
National Parks Index | US Itineraries Index | American Roadtrips Index

Bring home a Bugville Critters book and watch as your child's love for reading and learning grows with every page. Hand-painted illustrations bring the heartwarming stories to life. Ask your librarian to add Bugville Critters to the library's digital collection today!
Discover William Stanek's Exclusive Art Collection
Explore and purchase the stunning art featured on this site. Own a piece of William Stanek's unique and captivating artwork today!
(May 2, 2025) A 5-Day Journey Through Colorado's Wild Landscapes: Black Canyon, Mesa Verde, Great Sand Dunes, and Rocky Mountain National Parks
Introduction: Embracing Colorado's Diverse Wilderness
Colorado's landscapes are as varied as they are breathtaking. From the deep, narrow chasms of the Black Canyon of the Gunnison, to the ancient cliff dwellings of Mesa Verde, the towering dunes of the Great Sand Dunes, and the majestic peaks of Rocky Mountain National Park, this state offers an unparalleled diversity of natural wonders. This five-day journey will take you through some of Colorado's most iconic and awe-inspiring parks, each offering a unique experience that highlights the state's rugged beauty and rich history.
Whether you're standing on the rim of the Black Canyon, exploring the mysteries of ancient civilizations in Mesa Verde, marveling at the vast sand dunes against a backdrop of snow-capped peaks, or hiking through the alpine meadows of the Rockies, each day promises to be an adventure filled with discovery, inspiration, and unforgettable memories.
Join us as we embark on a journey through the heart of Colorado, where every day brings new landscapes, new challenges, and new opportunities to connect with nature in its most raw and beautiful form.
Day 1: Black Canyon of the Gunnison National Park – Colorado's Deepest Chasm
Morning: Sunrise at Gunnison Point
Overview
Begin your journey with a sunrise visit to Gunnison Point, one of the most dramatic overlooks in Black Canyon of the Gunnison National Park. The point offers breathtaking views of the canyon's sheer, dark walls, which plunge over 2,000 feet to the Gunnison River below. Watching the sunrise here is a serene and awe-inspiring experience, as the first light of the day illuminates the rugged cliffs and creates deep shadows in the canyon.
Tips from William
"Gunnison Point is a photographer's dream, especially at sunrise when the light is soft and the contrasts are dramatic. Bring a tripod and a wide-angle lens to capture the full depth and scale of the canyon. A polarizing filter can help reduce glare and bring out the deep blues of the sky and the dark tones of the canyon walls."
Insights from Hui Cha
"Arriving at Gunnison Point before dawn allows you to experience the park in its quietest and most serene moments. The stillness of the canyon, the cool morning air, and the sight of the sun slowly illuminating the canyon walls create a sense of peace and connection to this ancient landscape."
How to Access Gunnison Point
Directions:
- Gunnison Point is located near the South Rim Visitor Center of Black Canyon of the Gunnison National Park, just off US-50. The overlook is easily accessible from the visitor center, with a short walk leading to the viewpoint.
Viewpoint Details:
- Location: South Rim, Black Canyon of the Gunnison National Park, CO
- Elevation Gain: Minimal
- Difficulty: Easy
Photography Tips: For the best shots at Gunnison Point, position yourself along the rim to capture the dramatic depth of the canyon. Use a small aperture (f/16 or smaller) to keep the entire scene in focus, and experiment with different compositions to highlight the textures and layers of the rock formations.
Alternative Activity: If an early morning visit to Gunnison Point sounds too demanding, consider visiting later in the morning when the light is still good for photography, and you can explore the nearby Rim Rock Nature Trail, a short hike that offers equally stunning views of the canyon.
Mid-Morning: Exploring the South Rim Scenic Drive
Overview
After your sunrise experience, take a leisurely drive along the South Rim Scenic Drive, which offers some of the best views of Black Canyon. The drive includes several overlooks where you can stop to take in the views, photograph the canyon's dramatic cliffs, and learn more about the park's geology and history.
Tips from William
"The South Rim Scenic Drive offers endless opportunities for landscape photography. Bring a telephoto lens to capture close-up shots of the intricate rock formations and a wide-angle lens for the sweeping views of the canyon. The best light for photography is in the mid-morning when the sun is high enough to illuminate the canyon but not too harsh."
Insights from Hui Cha
"Driving the South Rim Scenic Drive is a journey through one of Colorado's most awe-inspiring landscapes. The sight of the canyon from the overlooks, the sound of the wind on the rim, and the views of the Gunnison River far below create a sense of wonder and connection to this ancient and powerful place."
How to Access the South Rim Scenic Drive
Directions:
- The South Rim Scenic Drive begins at the South Rim Visitor Center and follows the rim of the canyon for about 7 miles. The drive is well-marked, with several pullouts and overlooks along the way.
Scenic Drive Details:
- Location: South Rim, Black Canyon of the Gunnison National Park, CO
- Difficulty: Easy (drive with short walks)
Photography Tips: For the best shots along the South Rim Scenic Drive, focus on capturing the play of light and shadow on the canyon walls. Use a wide-angle lens to capture the expansive views and a telephoto lens to zoom in on the details of the rock formations and river below.
Alternative Activity: If driving the entire South Rim Scenic Drive sounds too long, consider stopping at Painted Wall View, which offers a close-up view of the park's tallest cliff, a 2,250-foot vertical wall with dramatic rock formations.
Afternoon: Hiking the Warner Point Nature Trail
Overview
In the afternoon, stretch your legs with a hike on the Warner Point Nature Trail, a short but scenic trail that takes you to the highest point on the South Rim. The trail offers stunning views of the canyon, the San Juan Mountains, and the Uncompahgre Valley. Interpretive signs along the trail provide information about the park's geology, flora, and fauna.
Tips from William
"The Warner Point Nature Trail is perfect for landscape and documentary photography. Bring a wide-angle lens to capture the expansive views of the canyon and surrounding mountains, and a telephoto lens for close-up shots of the plants and wildlife along the trail. The best light for photography is in the late afternoon when the sun is low in the sky and the shadows are long."
Insights from Hui Cha
"Hiking the Warner Point Nature Trail is a peaceful and inspiring experience. The sight of the canyon from the trail, the sound of the wind in the trees, and the views of the distant mountains create a sense of connection to the land and the natural world."
How to Access the Warner Point Nature Trail
Directions:
- The Warner Point Nature Trailhead is located at the end of the South Rim Scenic Drive. The trail is well-marked and includes several scenic viewpoints along the way.
Trail Details:
- Trail Length: 1.5 miles round-trip
- Elevation Gain: 300 feet
- Difficulty: Moderate
Photography Tips: For the best shots along the Warner Point Nature Trail, focus on capturing the contrast between the rugged canyon and the distant mountains. A tripod can help stabilize your camera for sharp images, especially in the low light under the trees.
Alternative Activity: If the Warner Point Nature Trail sounds too challenging, consider exploring the shorter Cedar Point Nature Trail, a 0.6-mile round-trip hike that offers beautiful views of the Painted Wall and the Gunnison River below.
Evening: Sunset at Sunset View
Overview
End your day with a sunset visit to Sunset View, a popular overlook on the South Rim that offers stunning views of the canyon as the sun sets behind the distant mountains. Watching the sunset here is a peaceful and awe-inspiring experience, as the last light of the day casts warm, golden hues on the canyon walls.
Tips from William
"Sunset View is a fantastic spot for sunset photography. Bring a wide-angle lens to capture the full scope of the canyon, and consider using a graduated neutral density filter to balance the exposure between the bright sky and the darker land. The best light for photography is in the late evening when the sun is low in the sky and the shadows are long."
Insights from Hui Cha
"Watching the sunset from Sunset View is a peaceful and inspiring experience. The colors of the sky, the stillness of the canyon, and the sound of the wind create a sense of calm and connection to nature. It's a perfect way to end the day."
How to Access Sunset View
Directions:
- Sunset View is located along the South Rim Scenic Drive, about 4 miles from the South Rim Visitor Center. The overlook is easily accessible from the road, with a short walk leading to the viewpoint.
Viewpoint Details:
- Location: South Rim, Black Canyon of the Gunnison National Park, CO
- Elevation Gain: Minimal
- Difficulty: Easy
Photography Tips: For a stunning sunset shot, position yourself on the western side of the overlook to capture the last light of the day as it illuminates the canyon walls and surrounding landscape. Use a small aperture (f/16 or smaller) to keep the entire scene in focus, and experiment with different compositions to highlight the layers and textures of the rock formations.
Alternative Activity: If watching the sunset from Sunset View sounds too crowded, consider heading to the nearby Pulpit Rock Overlook, where you can enjoy equally beautiful views of the canyon in a more secluded setting.
Day 2: Mesa Verde National Park – Exploring Ancient Civilizations
Morning: Sunrise at Mesa Top Loop
Overview
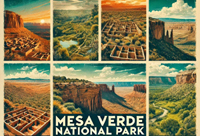
Begin your second day with a sunrise visit to the Mesa Top Loop, a scenic drive that takes you past some of the most significant archaeological sites in Mesa Verde National Park. The loop offers stunning views of the park's cliff dwellings, as well as the surrounding canyons and mesas. Watching the sunrise here is a serene and awe-inspiring experience, as the first light of the day illuminates the ancient structures and the rugged landscape.
Tips from William
"Mesa Top Loop is a great spot for sunrise photography, especially if you're interested in capturing the ancient cliff dwellings. Bring a tripod and a wide-angle lens to capture the full scope of the landscape, and consider using a polarizing filter to reduce glare and enhance the colors of the rock formations."
Insights from Hui Cha
"Arriving at the Mesa Top Loop before dawn allows you to experience the park in its quietest and most serene moments. The stillness of the canyons, the cool morning air, and the sight of the sun slowly illuminating the ancient structures create a sense of peace and connection to this sacred landscape."
How to Access the Mesa Top Loop
Directions:
- The Mesa Top Loop is located along the Chapin Mesa Road in Mesa Verde National Park, just off US-160. The loop is well-marked, with several pullouts and overlooks along the way.
Scenic Drive Details:
- Location: Mesa Verde National Park, CO
- Elevation Gain: Minimal
- Difficulty: Easy (drive with short walks)
Photography Tips: For the best shots along the Mesa Top Loop, focus on capturing the play of light and shadow on the ancient structures and surrounding canyons. Use a wide-angle lens to capture the expansive views and a telephoto lens to zoom in on the details of the cliff dwellings.
Alternative Activity: If an early morning visit to the Mesa Top Loop sounds too demanding, consider visiting later in the morning when the light is still good for photography, and you can explore the nearby Far View Sites Complex, a collection of mesa-top villages and agricultural sites.
Mid-Morning: Exploring Cliff Palace and Balcony House
Overview
After your sunrise experience, take a guided tour of Cliff Palace and Balcony House, two of the most famous and well-preserved cliff dwellings in Mesa Verde National Park. These ancient structures offer a fascinating glimpse into the lives of the Ancestral Puebloans who lived in this region over 700 years ago. The tours provide an opportunity to explore the dwellings up close and learn about the history, culture, and architecture of this remarkable civilization.
Tips from William
"Cliff Palace and Balcony House are perfect for historic and documentary photography. Bring a wide-angle lens to capture the full scope of the dwellings and a telephoto lens for close-up shots of the details. The best light for photography is in the mid-morning when the sun is high enough to illuminate the structures but not too harsh."
Insights from Hui Cha
"Exploring Cliff Palace and Balcony House is a journey through time. The sight of the ancient structures, the sound of the wind in the canyons, and the stories of the people who lived and worked here create a sense of connection to the past and the challenges of life in this rugged landscape."
How to Access Cliff Palace and Balcony House
Directions:
- Cliff Palace and Balcony House are located along the Cliff Palace Loop in Mesa Verde National Park. The trailheads for the tours are well-marked, with parking available near the sites.
Tour Details:
- Tour Length: 1 hour each
- Elevation Gain: Varies (depending on the site)
- Difficulty: Moderate (steep stairs and ladders)
Photography Tips: For the best shots at Cliff Palace and Balcony House, focus on capturing the contrast between the ancient structures and the surrounding canyons. Use a wide-angle lens to capture the full scene, and a telephoto lens to zoom in on the details of the masonry and architectural features.
Alternative Activity: If the guided tours of Cliff Palace and Balcony House sound too challenging, consider exploring the self-guided Spruce Tree House Trail, a shorter and easier walk that offers beautiful views of another well-preserved cliff dwelling.
Afternoon: Hiking the Petroglyph Point Trail
Overview
In the afternoon, stretch your legs with a hike on the Petroglyph Point Trail, a scenic trail that takes you past several ancient petroglyphs carved into the canyon walls. The trail offers stunning views of the park's canyons, mesas, and archaeological sites, as well as opportunities to see wildlife and unique rock formations.
Tips from William
"The Petroglyph Point Trail is perfect for landscape and documentary photography. Bring a wide-angle lens to capture the expansive views of the canyons and mesas, and a telephoto lens for close-up shots of the petroglyphs and wildlife along the trail. The best light for photography is in the late afternoon when the sun is low in the sky and the shadows are long."
Insights from Hui Cha
"Hiking the Petroglyph Point Trail is a peaceful and inspiring experience. The sight of the ancient carvings, the sound of the wind in the canyons, and the views of the distant mesas create a sense of connection to the land and the people who lived here long ago."
How to Access the Petroglyph Point Trail
Directions:
- The Petroglyph Point Trailhead is located near the Chapin Mesa Museum in Mesa Verde National Park. The trail is well-marked and includes several scenic viewpoints along the way.
Trail Details:
- Trail Length: 2.4 miles round-trip
- Elevation Gain: 300 feet
- Difficulty: Moderate
Photography Tips: For the best shots along the Petroglyph Point Trail, focus on capturing the contrast between the rugged canyons and the ancient petroglyphs. A tripod can help stabilize your camera for sharp images, especially in the low light under the canyon walls.
Alternative Activity: If the Petroglyph Point Trail sounds too challenging, consider exploring the shorter Knife Edge Trail, a 2-mile round-trip hike that offers beautiful views of the Montezuma Valley and the surrounding mesas.
Evening: Sunset at Park Point Overlook
Overview
End your day with a sunset visit to Park Point Overlook, the highest point in Mesa Verde National Park. The overlook offers panoramic views of the surrounding canyons, mesas, and distant mountains, making it a perfect spot to watch the sun set over this ancient landscape.
Tips from William
"Park Point Overlook is a fantastic spot for sunset photography. Bring a wide-angle lens to capture the full scope of the landscape, and consider using a graduated neutral density filter to balance the exposure between the bright sky and the darker land. The best light for photography is in the late evening when the sun is low in the sky and the shadows are long."
Insights from Hui Cha
"Watching the sunset from Park Point Overlook is a peaceful and inspiring experience. The colors of the sky, the stillness of the canyons, and the sound of the wind create a sense of calm and connection to nature. It's a perfect way to end the day."
How to Access Park Point Overlook
Directions:
- Park Point Overlook is located along the Chapin Mesa Road, about 5 miles from the Far View Visitor Center. The overlook is easily accessible from the road, with a short walk leading to the viewpoint.
Viewpoint Details:
- Location: Mesa Verde National Park, CO
- Elevation Gain: Minimal
- Difficulty: Easy
Photography Tips: For a stunning sunset shot, position yourself on the western side of the overlook to capture the last light of the day as it illuminates the canyons and surrounding landscape. Use a small aperture (f/16 or smaller) to keep the entire scene in focus, and experiment with different compositions to highlight the layers and textures of the rock formations.
Alternative Activity: If watching the sunset from Park Point Overlook sounds too crowded, consider heading to the nearby Geologic Overlook, where you can enjoy equally beautiful views of the park's canyons and mesas in a more secluded setting.
Day 3: Great Sand Dunes National Park – Colorado's Surreal Desert Landscape
Morning: Sunrise at the Dunes
Overview
Begin your third day with a sunrise visit to the Great Sand Dunes, the tallest dunes in North America, rising up to 750 feet. The sight of the sun rising over the dunes, casting long shadows and creating dramatic contrasts between the light and dark sand, is a truly surreal and awe-inspiring experience.
Tips from William
"The Great Sand Dunes are a photographer's paradise, especially at sunrise when the light is soft and the shadows are long. Bring a tripod and a wide-angle lens to capture the full scope of the dunes and consider using a polarizing filter to enhance the colors of the sand and sky."
Insights from Hui Cha
"Arriving at the dunes before dawn allows you to experience the park in its most peaceful moments. The stillness of the desert, the cool morning air, and the sight of the sun slowly illuminating the dunes create a sense of peace and connection to this unique landscape."
How to Access the Great Sand Dunes
Directions:
- The Great Sand Dunes are located along CO-150, just off US-160. The dunes are easily accessible from the Great Sand Dunes Visitor Center, with parking available near the dunes.
Viewpoint Details:
- Location: Great Sand Dunes National Park, CO
- Elevation Gain: Varies (depending on how far you hike into the dunes)
- Difficulty: Moderate to Strenuous
Photography Tips: For the best shots at the Great Sand Dunes, position yourself on a high dune to capture the sweeping views of the sand and the surrounding mountains. Use a small aperture (f/16 or smaller) to keep the entire scene in focus, and experiment with different compositions to highlight the textures and patterns of the sand.
Alternative Activity: If hiking into the dunes sounds too challenging, consider exploring the Medano Creek area near the base of the dunes, where you can enjoy the sight of the dunes from a distance and capture beautiful reflections in the water.
Mid-Morning: Exploring the Dunes and Medano Creek
Overview
After your sunrise experience, spend the morning exploring the dunes and Medano Creek, a seasonal stream that flows at the base of the dunes. The contrast between the dry, towering dunes and the cool, flowing water creates a unique and surreal landscape that is perfect for photography and exploration.
Tips from William
"Exploring the dunes and Medano Creek offers endless opportunities for landscape photography. Bring a wide-angle lens to capture the expansive views of the dunes and creek, and a telephoto lens for close-up shots of the plants, water patterns, and wildlife. The best light for photography is in the mid-morning when the sun is high enough to illuminate the landscape but not too harsh."
Insights from Hui Cha
"Walking through Medano Creek and the surrounding dunes is a unique and awe-inspiring experience. The sight of the water flowing at the base of the dunes, the sound of the wind in the sand, and the views of the surrounding mountains create a sense of wonder and connection to this surreal landscape."
How to Access Medano Creek
Directions:
- Medano Creek is located at the base of the Great Sand Dunes, near the Great Sand Dunes Visitor Center. The creek is easily accessible by a short walk from the parking area.
Creek Details:
- Location: Great Sand Dunes National Park, CO
- Elevation Gain: Minimal
- Difficulty: Easy
Photography Tips: For the best shots at Medano Creek, focus on capturing the contrast between the flowing water and the towering dunes. Use a wide-angle lens to capture the full scene, and a telephoto lens to zoom in on the details of the water patterns and reflections.
Alternative Activity: If exploring Medano Creek sounds too crowded, consider hiking the nearby Montville Nature Trail, a 1-mile loop that offers beautiful views of the dunes and surrounding mountains from a more elevated perspective.
Afternoon: Hiking the High Dune Trail
Overview
In the afternoon, challenge yourself with a hike to the top of High Dune, one of the tallest dunes in Great Sand Dunes National Park. The hike offers stunning views of the surrounding dunes, mountains, and valleys, as well as the chance to experience the unique sensation of walking on shifting sand.
Tips from William
"The High Dune Trail is perfect for landscape photography. Bring a wide-angle lens to capture the expansive views of the dunes and surrounding mountains, and a telephoto lens for close-up shots of the patterns and textures in the sand. The best light for photography is in the late afternoon when the sun is low in the sky and the shadows are long."
Insights from Hui Cha
"Hiking to the top of High Dune is a challenging but rewarding experience. The sight of the endless dunes stretching out before you, the sound of the wind in the sand, and the views of the distant mountains create a sense of awe and connection to this surreal landscape."
How to Access the High Dune Trail
Directions:
- The trailhead for High Dune is located near the Great Sand Dunes Visitor Center. The trail is unmarked, but hikers generally follow the ridges of the dunes toward the highest point.
Trail Details:
- Trail Length: 2.5 miles round-trip
- Elevation Gain: 650 feet
- Difficulty: Strenuous (due to steep, sandy terrain)
Photography Tips: For the best shots along the High Dune Trail, focus on capturing the contrast between the shifting sand and the distant mountains. A tripod can help stabilize your camera for sharp images, especially in the low light under the dunes.
Alternative Activity: If the hike to High Dune sounds too challenging, consider exploring the shorter Mosca Pass Trail, a 6.5-mile round-trip hike that offers beautiful views of the dunes, forest, and surrounding mountains with less sandy terrain.
Evening: Sunset at the Dunes Overlook
Overview
End your day with a sunset visit to the Dunes Overlook, a scenic viewpoint that offers panoramic views of the Great Sand Dunes, the Sangre de Cristo Mountains, and the surrounding valleys. Watching the sunset here is a peaceful and awe-inspiring experience, as the last light of the day casts warm, golden hues on the dunes and creates long, dramatic shadows.
Tips from William
"The Dunes Overlook is a fantastic spot for sunset photography. Bring a wide-angle lens to capture the full scope of the landscape, and consider using a graduated neutral density filter to balance the exposure between the bright sky and the darker land. The best light for photography is in the late evening when the sun is low in the sky and the shadows are long."
Insights from Hui Cha
"Watching the sunset from the Dunes Overlook is a peaceful and inspiring experience. The colors of the sky, the stillness of the dunes, and the sound of the wind create a sense of calm and connection to nature. It's a perfect way to end the day."
How to Access the Dunes Overlook
Directions:
- The Dunes Overlook is located along the Dunes Overlook Road, near the Great Sand Dunes Visitor Center. The overlook is easily accessible from the road, with a short walk leading to the viewpoint.
Viewpoint Details:
- Location: Great Sand Dunes National Park, CO
- Elevation Gain: Minimal
- Difficulty: Easy
Photography Tips: For a stunning sunset shot, position yourself on the western side of the overlook to capture the last light of the day as it illuminates the dunes and surrounding landscape. Use a small aperture (f/16 or smaller) to keep the entire scene in focus, and experiment with different compositions to highlight the layers and textures of the sand.
Alternative Activity: If watching the sunset from the Dunes Overlook sounds too crowded, consider heading to the nearby Zapata Falls, where you can enjoy equally beautiful views of the dunes and surrounding mountains in a more secluded setting.
Day 4: Rocky Mountain National Park – Majestic Peaks and Alpine Meadows
Morning: Sunrise at Bear Lake
Overview
Begin your fourth day with a sunrise visit to Bear Lake, one of the most picturesque spots in Rocky Mountain National Park. Nestled beneath the towering peaks of the Continental Divide, Bear Lake offers stunning reflections of the surrounding mountains in its calm waters. Watching the sunrise here is a serene and awe-inspiring experience, as the first light of the day illuminates the peaks and creates a mirror-like reflection on the lake's surface.
Tips from William
"Bear Lake is a photographer's dream, especially at sunrise when the light is soft and the reflections are perfect. Bring a tripod and a wide-angle lens to capture the full scene, including the lake, mountains, and sky. The best light for photography is just after sunrise when the colors are most vibrant."
Insights from Hui Cha
"Arriving at Bear Lake before dawn allows you to experience the park in its quietest and most peaceful moments. The stillness of the lake, the crisp morning air, and the sight of the sun slowly rising over the mountains create a sense of calm and connection to nature."
How to Access Bear Lake
Directions:
- Bear Lake is located along Bear Lake Road in Rocky Mountain National Park, about 9 miles from the Beaver Meadows entrance. The lake is easily accessible from the Bear Lake parking area, with a short walk leading to the shore.
Viewpoint Details:
- Location: Bear Lake, Rocky Mountain National Park, CO
- Elevation Gain: Minimal
- Difficulty: Easy (0.5-mile loop around the lake)
Photography Tips: For the best shots at Bear Lake, position yourself on the eastern shore to capture the reflections of the mountains in the water. Use a small aperture (f/16 or smaller) to keep the entire scene in focus, and experiment with long exposures to smooth the water's surface and enhance the reflections.
Alternative Activity: If an early morning visit to Bear Lake sounds too demanding, consider visiting Sprague Lake later in the morning. Sprague Lake offers equally beautiful views with a shorter, easier walk around its perimeter and is another excellent spot for photography.
Mid-Morning: Hiking the Dream Lake Trail
Overview
After your sunrise experience, continue your exploration of Rocky Mountain National Park with a hike to Dream Lake, one of the park's most popular and scenic trails. The trail takes you past Nymph Lake and continues upward to Dream Lake, offering stunning views of the surrounding peaks and alpine scenery.
Tips from William
"The Dream Lake Trail is perfect for landscape photography. Bring a wide-angle lens to capture the expansive views of the lake and surrounding mountains, and a telephoto lens for close-up shots of the wildflowers and wildlife along the trail. The best light for photography is in the mid-morning when the sun is high enough to illuminate the landscape but not too harsh."
Insights from Hui Cha
"Hiking to Dream Lake is a journey through some of the most beautiful alpine landscapes in Colorado. The sight of the clear blue water, the sound of the wind in the trees, and the views of the snow-capped peaks create a sense of wonder and connection to the natural world."
How to Access the Dream Lake Trail
Directions:
- The trailhead for Dream Lake is located at the Bear Lake parking area. The trail is well-marked and includes several scenic viewpoints along the way.
Trail Details:
- Trail Length: 2.2 miles round-trip
- Elevation Gain: 450 feet
- Difficulty: Moderate
Photography Tips: For the best shots at Dream Lake, position yourself on the eastern shore to capture the reflections of Hallett Peak in the water. A tripod can help stabilize your camera for sharp images, especially in the low light under the trees.
Alternative Activity: If the hike to Dream Lake sounds too challenging, consider taking the easier hike to Nymph Lake, a 1-mile round-trip trail that offers beautiful views of a lily-covered pond and the surrounding forest.
Afternoon: Driving Trail Ridge Road
Overview
In the afternoon, take a drive along Trail Ridge Road, the highest continuous paved road in the United States. This scenic route offers breathtaking views of the park's alpine tundra, with numerous pullouts where you can stop to take in the views and capture photos. As you drive, you'll cross the Continental Divide and experience the unique ecosystems of the park's high country.
Tips from William
"Trail Ridge Road offers endless opportunities for landscape photography. Bring a wide-angle lens to capture the expansive views of the tundra and surrounding mountains, and a telephoto lens for zooming in on the details of the alpine wildflowers and wildlife. The best light for photography is in the late afternoon when the sun is low in the sky and the shadows are long."
Insights from Hui Cha
"Driving Trail Ridge Road is a journey through the heart of Rocky Mountain National Park. The sight of the alpine tundra, the sound of the wind in the high country, and the views from the Continental Divide create a sense of awe and connection to the wild beauty of this place. Be sure to dress warmly, as temperatures can be much cooler at higher elevations."
How to Access Trail Ridge Road
Directions:
- Trail Ridge Road begins at the Beaver Meadows entrance to Rocky Mountain National Park and continues westward across the park to Grand Lake. The road is typically open from late May to mid-October, depending on weather conditions.
Scenic Drive Details:
- Location: Rocky Mountain National Park, CO
- Elevation Gain: 4,000 feet (from Estes Park to the summit)
- Difficulty: Easy (drive with short walks)
Photography Tips: For the best shots along Trail Ridge Road, focus on capturing the play of light and shadow on the tundra and mountains. Use a wide-angle lens to capture the expansive views and a telephoto lens to zoom in on the details of the alpine plants and animals.
Alternative Activity: If driving the entire length of Trail Ridge Road sounds too long, consider stopping at the Alpine Visitor Center, where you can take a short hike on the Alpine Ridge Trail, offering panoramic views of the surrounding mountains.
Evening: Sunset at Moraine Park
Overview
End your day with a sunset visit to Moraine Park, a large, glacier-carved valley in the heart of Rocky Mountain National Park. The park is known for its stunning views of the surrounding peaks and its abundant wildlife, including elk, deer, and coyotes. Watching the sunset here is a peaceful and beautiful experience, as the last light of the day illuminates the mountains and the valley below.
Tips from William
"Moraine Park is a fantastic spot for sunset photography, with wide, sweeping views of the valley and mountains. Set up your tripod well before sunset to find the best angle, and use a wide-angle lens to capture the full scene. A graduated neutral density filter will help balance the exposure between the bright sky and the darker landscape."
Insights from Hui Cha
"Watching the sunset at Moraine Park is a peaceful and inspiring experience. The colors of the sky, the stillness of the valley, and the sound of the wind in the trees create a sense of calm and connection to nature. It's a perfect way to end the day."
How to Access Moraine Park
Directions:
- From Estes Park, take US-36 west to the Moraine Park entrance of Rocky Mountain National Park. The park is easily accessible from the road, with several pullouts and picnic areas offering great views.
Viewpoint Details:
- Location: Moraine Park, Rocky Mountain National Park
- Elevation Gain: Minimal
- Difficulty: Easy
Photography Tips: For a stunning sunset shot, position yourself on the western side of the valley to capture the last light of the day as it illuminates the mountains and meadow. Use a small aperture (f/16 or smaller) to keep the entire scene in focus, and experiment with different shutter speeds to capture the changing light.
Alternative Activity: If watching the sunset at Moraine Park sounds too crowded, consider heading to the nearby Upper Beaver Meadows, where you can enjoy a more secluded sunset experience with equally beautiful views of the mountains and valley.
Day 5: Hiking to Alberta Falls and Emerald Lake
Morning: Start with a Sunrise Hike to Alberta Falls
Overview
On your final day, start with a sunrise hike to Alberta Falls, one of the most popular and beautiful waterfalls in Rocky Mountain National Park. The trail takes you through a forest of pine and aspen, with stunning views of the surrounding mountains and valleys. Arriving at the falls early in the morning allows you to enjoy the peacefulness of the area and capture beautiful photos in the soft morning light.
Tips from William
"Alberta Falls is a great spot for landscape and waterfall photography. Bring a tripod and a wide-angle lens to capture the full scene, including the falls, the forest, and the surrounding mountains. Use a slow shutter speed to create a silky effect on the water, and experiment with different compositions to highlight the falls and the surrounding landscape."
Insights from Hui Cha
"Hiking to Alberta Falls in the early morning is a peaceful and inspiring experience. The sight of the waterfall, the sound of the water rushing over the rocks, and the views of the surrounding mountains create a sense of connection to the natural world."
How to Access the Alberta Falls Trail
Directions:
- The trailhead for Alberta Falls is located at the Glacier Gorge parking area, along Bear Lake Road. The trail is well-marked and includes several scenic viewpoints along the way.
Trail Details:
- Trail Length: 1.6 miles round-trip
- Elevation Gain: 160 feet
- Difficulty: Easy to Moderate
Photography Tips: For the best shots at Alberta Falls, position yourself along the rocks at the base of the falls to capture the water flowing over the ledges. Use a slow shutter speed to create a silky effect on the water, and experiment with different compositions to highlight the falls and the surrounding landscape.
Alternative Activity: If the hike to Alberta Falls sounds too short, consider extending your hike to Mills Lake, a 5.6-mile round-trip trail that offers beautiful views of the falls, forest, and surrounding mountains.
Mid-Morning: Continue to Emerald Lake
Overview
After enjoying Alberta Falls, continue your hike to Emerald Lake, one of the most picturesque lakes in Rocky Mountain National Park. The trail takes you past the serene Nymph Lake and Dream Lake before reaching Emerald Lake, which is nestled beneath towering cliffs and surrounded by alpine meadows. The clear, emerald-green waters of the lake provide stunning reflections of the surrounding peaks.
Tips from William
"Emerald Lake is a photographer's paradise, especially in the morning when the light is soft and the reflections are perfect. Bring a tripod and a wide-angle lens to capture the full scene, including the lake, mountains, and sky. Use a polarizing filter to reduce glare and enhance the reflections in the water."
Insights from Hui Cha
"Hiking to Emerald Lake is a journey through some of the most beautiful alpine landscapes in Colorado. The sight of the clear green water, the sound of the wind in the trees, and the views of the snow-capped peaks create a sense of wonder and connection to the natural world."
How to Access the Emerald Lake Trail
Directions:
- The trailhead for Emerald Lake is located at the Bear Lake parking area. The trail is well-marked and includes several scenic viewpoints along the way.
Trail Details:
- Trail Length: 3.6 miles round-trip
- Elevation Gain: 605 feet
- Difficulty: Moderate
Photography Tips: For the best shots at Emerald Lake, position yourself on the western shore to capture the reflections of Hallett Peak and Flattop Mountain in the water. Use a small aperture (f/16 or smaller) to keep the entire scene in focus, and experiment with long exposures to smooth the water's surface and enhance the reflections.
Alternative Activity: If the hike to Emerald Lake sounds too challenging, consider taking the easier hike to Dream Lake, a 2.2-mile round-trip trail that offers beautiful views of a lily-covered pond and the surrounding forest.
Afternoon: Picnic at Sprague Lake
Overview
After your morning hike, enjoy a relaxing picnic at Sprague Lake, a beautiful spot located near the Bear Lake Road. The lake is known for its stunning views of the surrounding mountains and its tranquil atmosphere, making it a perfect spot to unwind and reflect on your journey through Rocky Mountain National Park.
Tips from William
"Sprague Lake is a great spot for landscape photography. Bring a wide-angle lens to capture the expansive views of the lake and surrounding mountains, and a telephoto lens for close-up shots of the plants and wildlife. The best light for photography is in the early afternoon when the sun is high in the sky and the shadows are minimal."
Insights from Hui Cha
"Picnicking at Sprague Lake is a peaceful and beautiful experience. The sight of the lake from the shore, the sound of the wind in the trees, and the beauty of the surrounding landscape create a sense of calm and connection to nature. It's a perfect way to end your journey through Rocky Mountain National Park."
How to Access Sprague Lake
Directions:
- Sprague Lake is located along Bear Lake Road in Rocky Mountain National Park, about 6 miles from the Beaver Meadows entrance. The lake is easily accessible from the parking area, with a short walk leading to the shore.
Picnic Area Details:
- Location: Sprague Lake, Rocky Mountain National Park, CO
- Elevation Gain: Minimal
- Difficulty: Easy (0.5-mile loop around the lake)
Photography Tips: For the best shots at Sprague Lake, position yourself on the eastern shore to capture the reflections of the mountains in the water. Use a small aperture (f/16 or smaller) to keep the entire scene in focus, and experiment with different compositions to highlight the reflections and layers of the landscape.
Alternative Activity: If picnicking at Sprague Lake sounds too crowded, consider heading to the nearby Alluvial Fan, where you can enjoy a more secluded picnic spot with equally beautiful views of the park and surrounding landscape.
Evening: Sunset at Deer Mountain
Overview
End your final day with a sunset hike to Deer Mountain, one of the most accessible peaks in Rocky Mountain National Park. The hike offers stunning views of the park's eastern slopes, including Longs Peak, Moraine Park, and Estes Park. Watching the sunset from the summit of Deer Mountain is a peaceful and awe-inspiring experience, as the last light of the day illuminates the mountains and valleys below.
Tips from William
"Deer Mountain is a fantastic spot for sunset photography. Bring a wide-angle lens to capture the full scope of the landscape, and consider using a graduated neutral density filter to balance the exposure between the bright sky and the darker land. The best light for photography is in the late evening when the sun is low in the sky and the shadows are long."
Insights from Hui Cha
"Watching the sunset from Deer Mountain is a peaceful and inspiring experience. The colors of the sky, the stillness of the mountains, and the sound of the wind create a sense of calm and connection to nature. It's a perfect way to end your journey through Rocky Mountain National Park."
How to Access Deer Mountain
Directions:
- The trailhead for Deer Mountain is located along US-36, near the Beaver Meadows entrance to Rocky Mountain National Park. The trail is well-marked and includes several scenic viewpoints along the way.
Trail Details:
- Trail Length: 6 miles round-trip
- Elevation Gain: 1,210 feet
- Difficulty: Moderate
Photography Tips: For a stunning sunset shot, position yourself on the summit of Deer Mountain to capture the last light of the day as it illuminates the mountains and surrounding landscape. Use a small aperture (f/16 or smaller) to keep the entire scene in focus, and experiment with different compositions to highlight the layers and textures of the land.
Alternative Activity: If the hike to Deer Mountain sounds too challenging, consider exploring the shorter hike to Lily Mountain, a 3.8-mile round-trip trail that offers beautiful views of the park and surrounding mountains with less elevation gain.
Conclusion: A Personal Reflection
As the sun set on our final day in Colorado, we stood on the summit of Deer Mountain, reflecting on the incredible journey we had just completed. From the deep chasms of the Black Canyon to the ancient ruins of Mesa Verde, the surreal dunes of the Great Sand Dunes, and the majestic peaks of Rocky Mountain National Park, each day had been a reminder of the incredible beauty and diversity of this state's wild landscapes.
These parks and trails are more than just places to visit – they are places to connect with the land, to find peace and inspiration, and to create memories that will last a lifetime. As we packed up our gear and prepared to leave Rocky Mountain National Park, I felt a deep sense of gratitude for the time we had spent in these wild, untamed places. They had not only shown us the beauty of Colorado but had also brought us closer to each other and to the world around us.
Our journey through Black Canyon, Mesa Verde, Great Sand Dunes, and Rocky Mountain National Parks had come to an end, but the experiences we had shared would stay with us forever. And as we drove away from the park, I knew that we would return, drawn back by the promise of new adventures and the chance to explore even deeper into the heart of Colorado's natural wonders.

Step into a world of timeless beauty with our premium, oversized hardcover book - crafted for discerning collectors and anyone who values the power of art. Perfect for your coffee table, it's more than just a book; it's a conversation starter, a window into over 30 years of William's visionary photography.
Your Support Matters
Purchasing artwork from William Stanek's collection not only brings beauty into your life but also helps us continue to share. Thank you for supporting our creative journey!

Support The Lights of Paris by Robert Stanek, William Stanek's pen name! Through vivid historical detail and deeply moving character stories, Robert takes readers on an unforgettable journey through one of history’s most transformative times.


